Usage from the Zope ZMI
The following screen shots show how to use this product through the web in the Zope ZMI.
Adding a MemCache Proxy
Choose MemCache Proxy from the drop-down list at the top right.
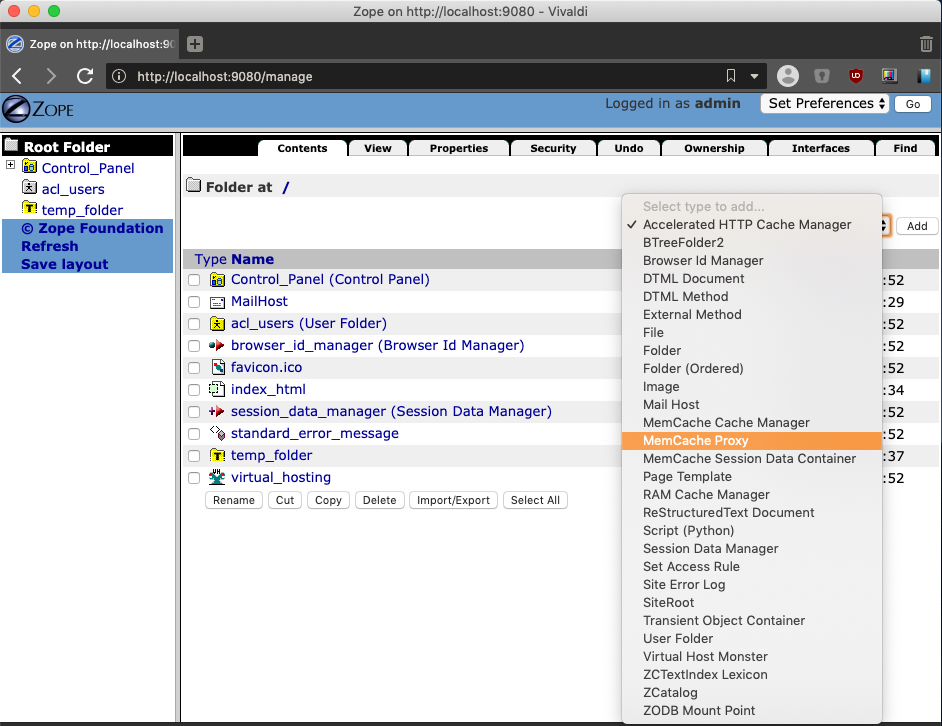
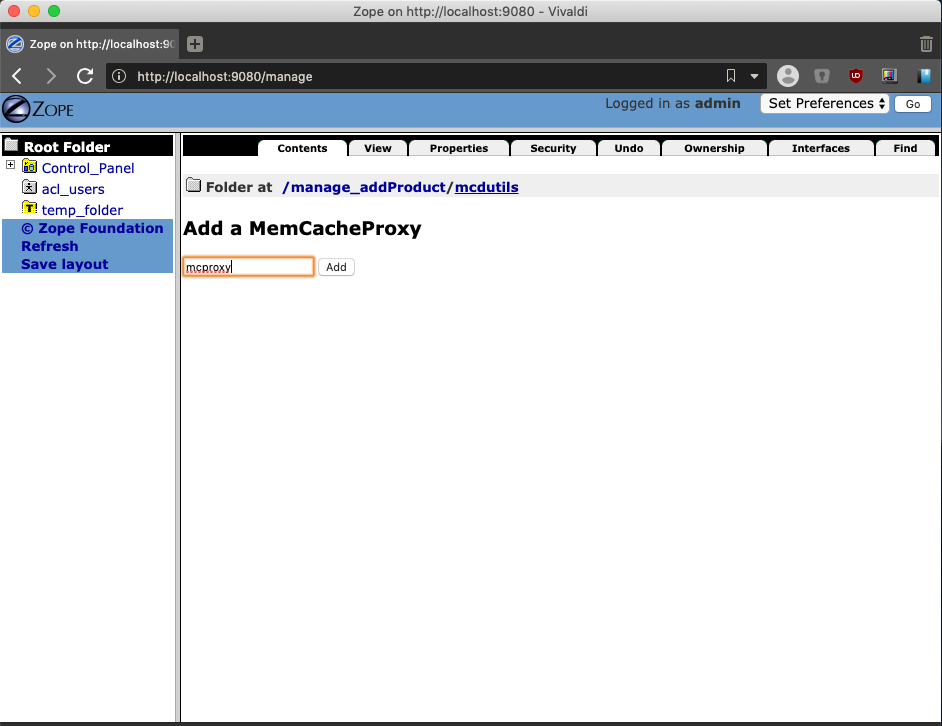
On the add form, give it a memorable name, e.g., mcproxy.
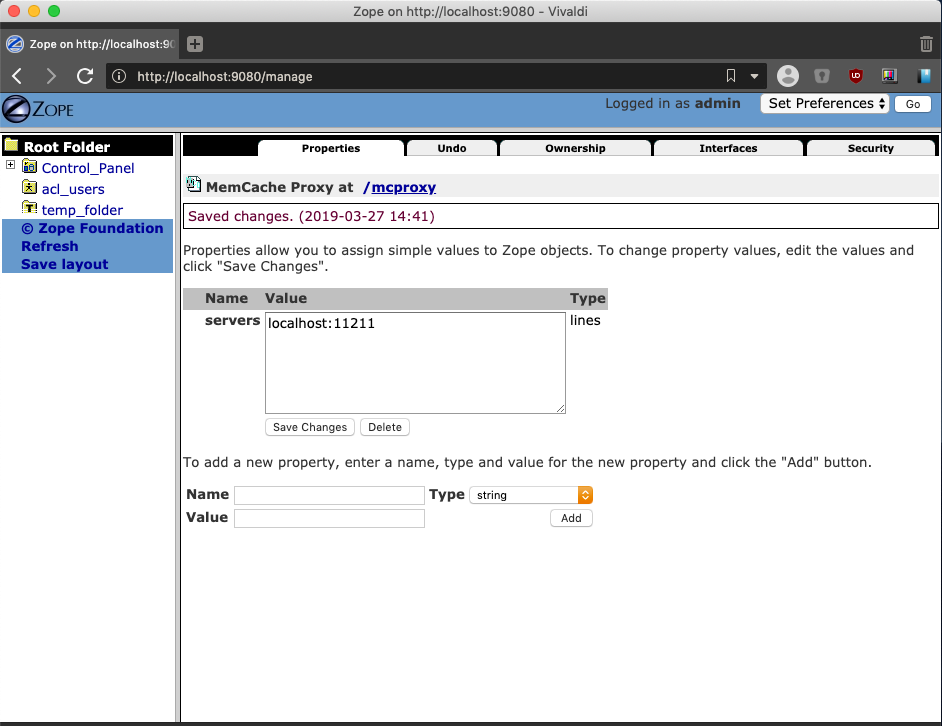
Click on the new mcproxy object and configure it using the
Properties ZMI tab. Set the servers property to a list of
servers, one per line, where each line is in the format <host>:<port>.
For instance, to use the memcached server running on the default port on
your local machine, the value would be localhost:11211.
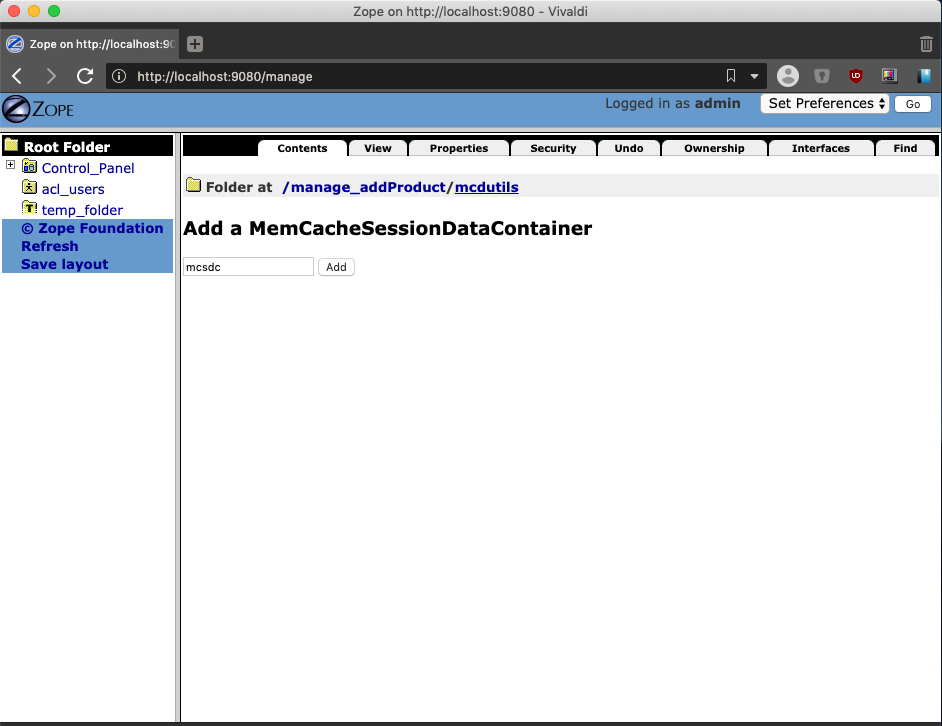
Adding a MemCache Session Data Container
At the root of the ZMI, choose MemCache Session Data Container from the drop-down list at the top right.
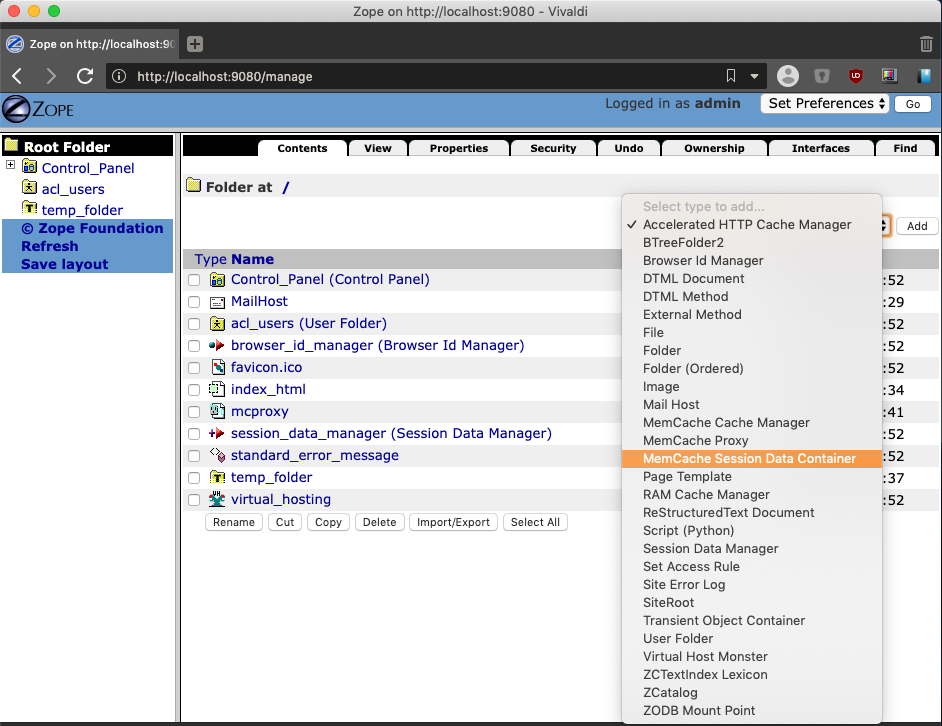
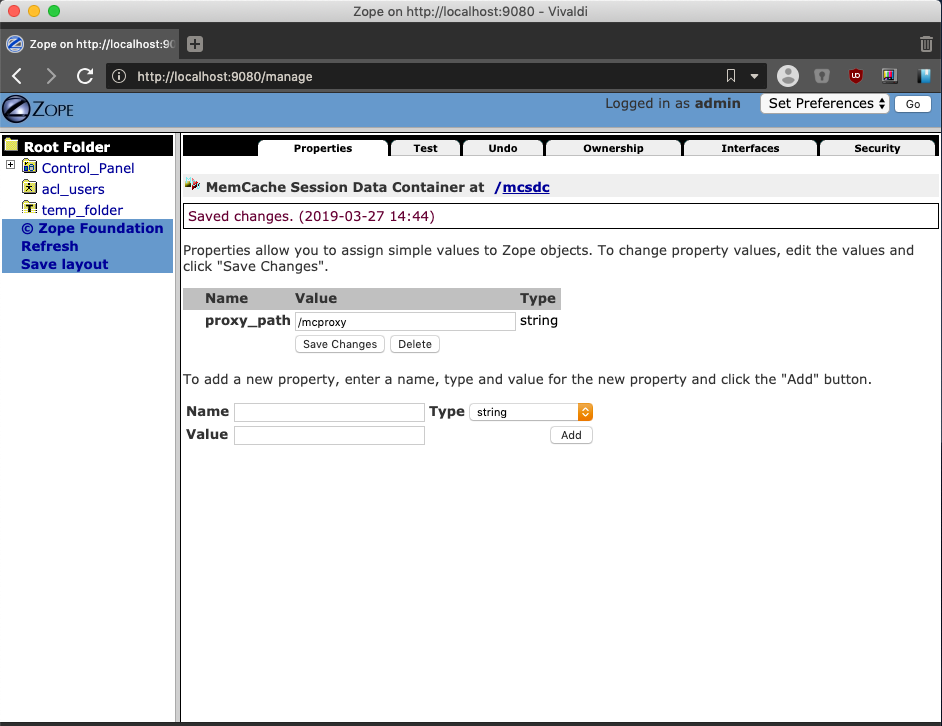
On the add form, give it a memorable name, e.g., mcsdc.
Click on the new msdc object and configure it using the Properties
ZMI tab. Use the MemCache Proxy object you created above
(/mcproxy).
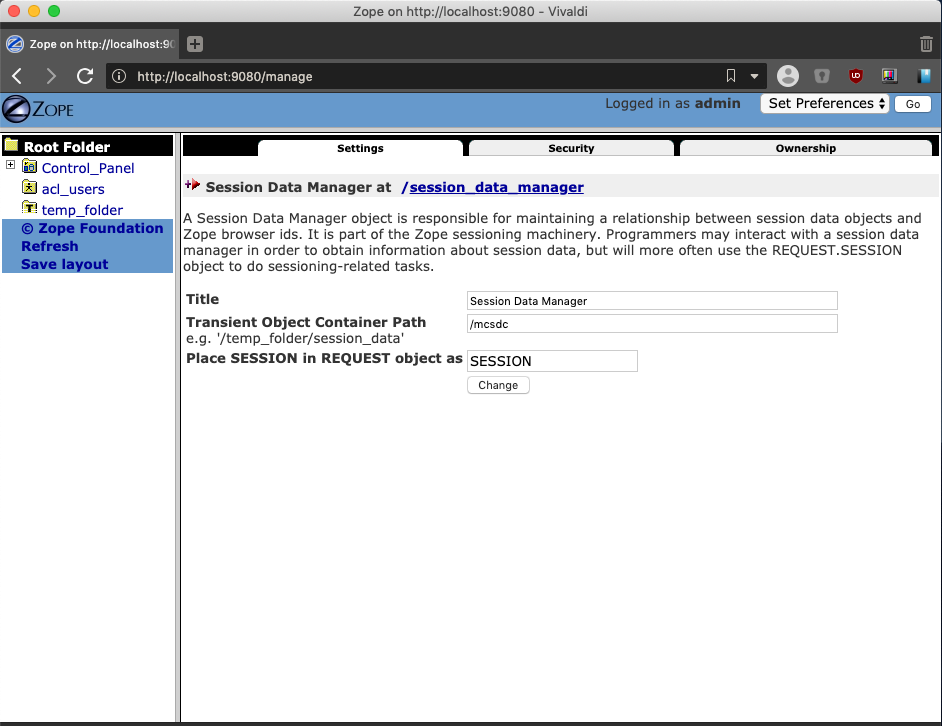
Configuring Zope sessions and testing
Finally, on the main tab of your session_data_manager instance
(typically also in the root of the ZMI), change the
Transient Object Container Path value to match the location of your new
MemCache Session Data Container, e.g. /mcsdc.
You can test the memcached configuration on the MemCache Session Data Container “Test” tab in the ZMI. Enter one or more lines describing key-value pairs, where the “key” for your session is separated from the value by the first space character. Note that the session values are displayed below the form.
